Maintaining your ATV (All-Terrain Vehicle) in optimal condition is essential for performance, longevity, and safety. One critical aspect of ATV maintenance is adjusting the valve clearance. Proper valve clearance ensures that your engine runs smoothly, efficiently, and reliably. In this comprehensive guide, we’ll delve into everything you need to know about adjusting ATV valve clearance, including why it’s important, how to do it, and tips to keep in mind.
Understanding Valve Clearance
Valve clearance, also known as valve lash, refers to the small gap between the valve stem and the rocker arm or camshaft. This gap is crucial for the proper functioning of the engine’s valves. Over time, due to engine heat and wear, this clearance can change, affecting engine performance. If the clearance is too tight, it can cause the valves to not close properly, leading to loss of compression and potential engine damage. Conversely, if the clearance is too loose, it can cause excessive noise and reduced engine efficiency.
Why Adjusting Valve Clearance is Important
1. Engine Performance
Correct valve clearance ensures that the valves open and close at the right times, maintaining proper air-fuel mixture and exhaust flow. This directly impacts the engine’s power and efficiency.
2. Preventing Damage
Improper valve clearance can lead to significant engine damage. Tight valves can burn out due to excessive heat, while loose valves can cause the valve train components to wear out prematurely.
3. Fuel Efficiency
Proper valve adjustment can improve fuel efficiency by ensuring the engine runs smoothly and efficiently, burning the fuel-air mixture effectively.
4. Longevity of the Engine
Regularly adjusting the valve clearance can prolong the life of your engine by reducing wear and tear on the valve train components.
When to Adjust Valve Clearance
The frequency of valve clearance adjustment depends on the make and model of your ATV and how frequently you use it. Generally, it’s recommended to check and adjust the valve clearance every 100 hours of operation or annually, whichever comes first. Always refer to your ATV’s owner manual for specific recommendations.
Tools You’ll Need
Before you begin, gather the necessary tools to adjust the valve clearance:
- Feeler gauges
- Wrenches (various sizes)
- Screwdrivers
- Torque wrench
- Valve cover gasket (if needed)
- Clean cloths
- Service manual for your ATV
Step-by-Step Guide to Adjusting Valve Clearance
1. Preparation
- Safety First: Ensure your ATV is on a flat, stable surface. Disconnect the battery to avoid accidental starts.
- Cool Engine: Allow the engine to cool down completely. Adjusting valves on a hot engine can give inaccurate measurements.
2. Accessing the Valves
- Remove the Necessary Components: Depending on your ATV model, you may need to remove the seat, fuel tank, and other components to access the valve cover.
- Remove the Valve Cover: Carefully remove the valve cover. Be cautious not to damage the gasket.
3. Setting the Engine to Top Dead Center (TDC)
- Locate TDC: Rotate the engine to TDC on the compression stroke. This can typically be done by rotating the crankshaft or using the kick starter. Refer to your service manual for precise instructions.
- Verify TDC: Ensure that both intake and exhaust valves are closed and the piston is at the top of the cylinder.
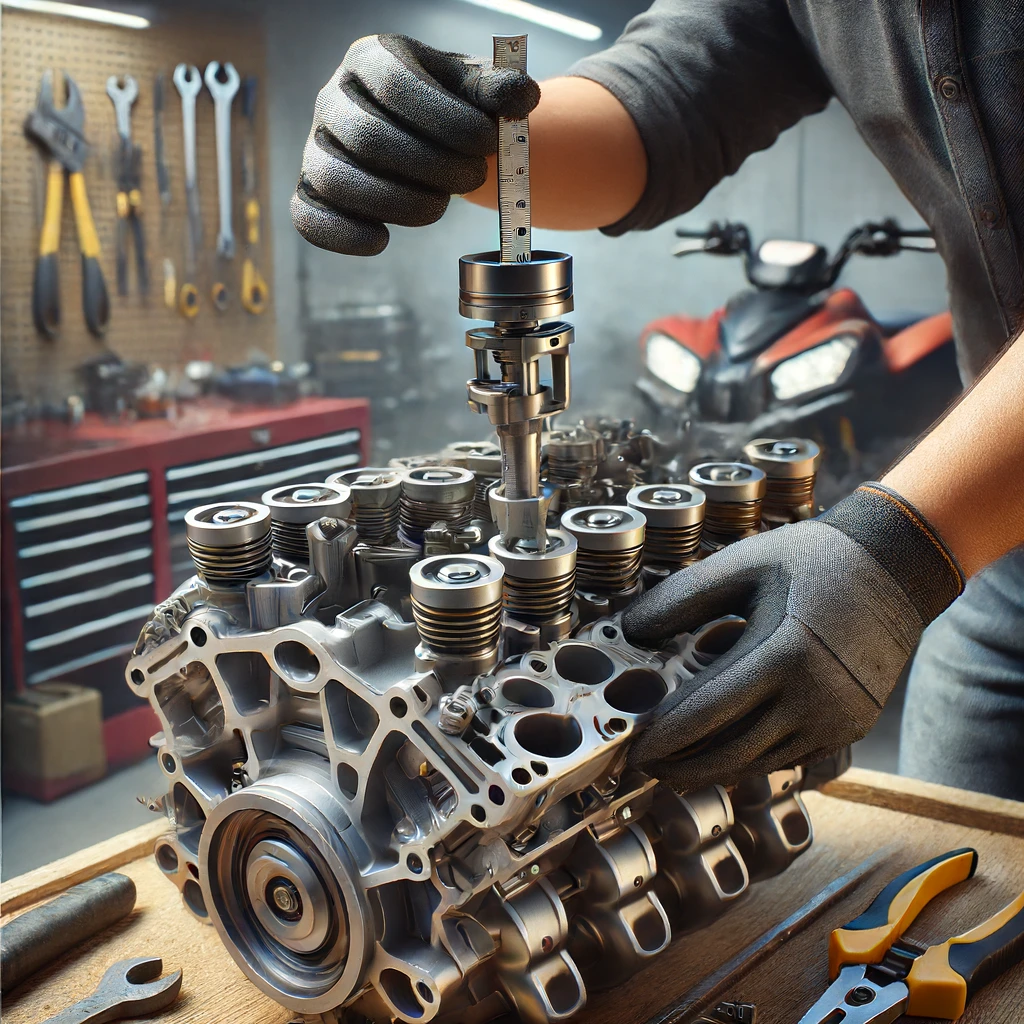
4. Measuring Valve Clearance
- Insert Feeler Gauge: Insert the appropriate feeler gauge between the valve stem and the rocker arm or camshaft. The gauge should slide in with slight resistance.
- Record Measurements: Measure the clearance for both intake and exhaust valves and compare them to the specifications provided in your service manual.
5. Adjusting the Valves
- Loosen the Lock Nut: Loosen the lock nut on the adjusting screw using a wrench.
- Adjust Clearance: Turn the adjusting screw until the feeler gauge fits snugly with the specified clearance.
- Tighten the Lock Nut: Hold the adjusting screw in place while tightening the lock nut. Recheck the clearance to ensure it didn’t change.
6. Reassembly
- Reinstall Valve Cover: Replace the valve cover and ensure the gasket is properly seated to prevent oil leaks.
- Reattach Components: Reinstall any components you removed, such as the fuel tank and seat.
- Reconnect Battery: Reconnect the battery and start the engine to check for any unusual noises.
Tips for Successful Valve Adjustment
1. Refer to the Manual
Always consult your ATV’s service manual for specific instructions and specifications related to valve clearance.
2. Work in a Clean Environment
Ensure your work area is clean to prevent any dirt or debris from entering the engine.
3. Double-Check Your Work
After adjusting the valves, double-check the clearances to ensure they are within the specified range.
4. Use Quality Tools
Invest in quality tools, especially feeler gauges and torque wrenches, to ensure accurate measurements and adjustments.
Common Issues and Troubleshooting
1. Excessive Noise
If you hear excessive noise from the valve area after adjustment, it could indicate loose valve clearance. Recheck and adjust as necessary.
2. Poor Performance
If your ATV runs poorly after adjusting the valves, you might have set the clearances too tight. Re-measure and adjust accordingly.
3. Oil Leaks
If you notice oil leaks around the valve cover, ensure the gasket is properly seated and the cover bolts are torqued to the correct specifications.
Adjusting the valve clearance on your ATV is a vital maintenance task that can significantly impact your vehicle’s performance and longevity. By following the proper steps and paying attention to detail, you can ensure your ATV runs smoothly and efficiently. Regularly scheduled maintenance, including valve adjustments, will keep your ATV in top shape, ready to tackle any terrain with confidence.
By understanding and performing this essential task, you not only enhance your mechanical skills but also deepen your connection with your ATV, ensuring many more adventures to come. Happy riding!
Incorporate this comprehensive guide into your routine maintenance to keep your ATV running at its best. Remember, proper care today prevents costly repairs tomorrow. For more tips and detailed guides on ATV maintenance, stay tuned to our blog and keep exploring the great outdoors with peace of mind.