Are you an ATV enthusiast looking to immortalize your rugged trail adventures? GoPro cameras and ATVs are like peanut butter and jelly – they just go together. With a GoPro mounted on your vehicle, you can capture every twist, turn, and tumble of your off-road escapades. However, securing that jaw-dropping footage is not just a matter of hitting the ‘record’ button; it’s an art form. So, buckle up and let’s dive into the nitty-gritty of capturing the best GoPro footage on your ATV.
The Perfect Setup for Your ATV Adventure
Choosing Your GoPro Model
When it comes to selecting a GoPro, the HERO series often takes the spotlight. The latest models, like the GoPro HERO9 Black, offer 5K video capture, HyperSmooth stabilization, and a suite of features designed for action-packed filming. Remember, resolution and frame rate are key – the higher, the smoother your off-roading footage will be.
Mounts and Angles: The Heart of the Action
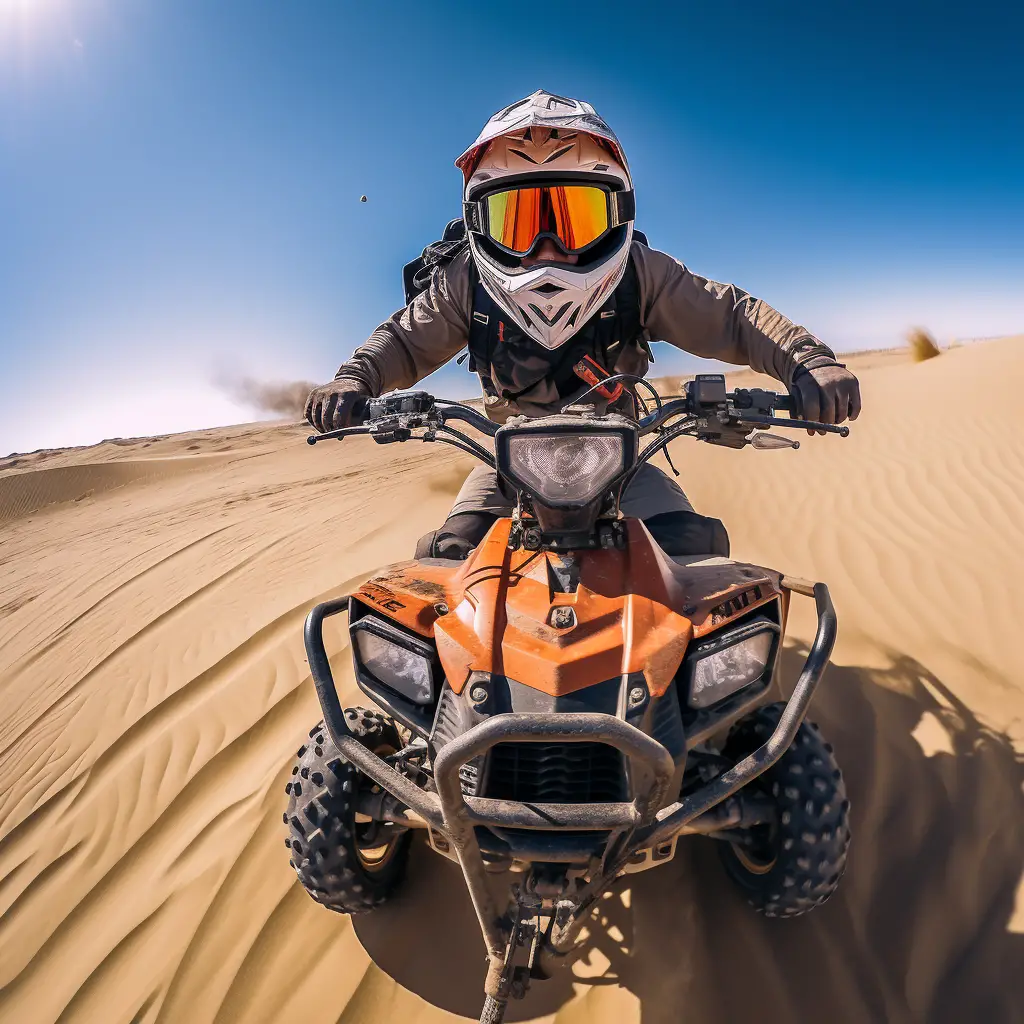
Mounting options for your GoPro are plentiful. Handlebar mounts, helmet mounts, and chest mounts each offer a unique perspective. The handlebar mount provides a stable, forward-facing view of the trail, while a helmet mount gives a first-person perspective. For those dramatic, immersive shots, a chest mount captures both handlebars and terrain, pulling viewers right into the action.
When choosing a mount, consider the kind of footage you want to capture. Experimenting with different angles can yield surprising results. Think about the rule of thirds, a classic photography guideline, which involves mentally dividing the frame into thirds both horizontally and vertically and placing the most interesting components of your shot along these lines or at their intersections.
GoPro Settings: Crisp and Clear
Delve into your GoPro’s settings to ensure you’re set up for success. A high frame rate, such as 60 frames per second (fps), is perfect for capturing fast-paced action with the option to create smooth slow-motion footage in post-production. ProTune, GoPro’s advanced settings feature, allows you to fine-tune settings like ISO and white balance, ensuring your footage remains crisp whether you’re riding under the bright midday sun or in the shadowy depths of a forest trail.
The Art of Capturing the Ride
Steady as You Go: Stabilization is Key
Nobody wants to watch shaky footage that makes you feel like you’re in a blender rather than on an ATV. GoPro’s HyperSmooth feature is a game-changer, offering gimbal-like stabilization without the gimbal. If your GoPro model doesn’t have this feature, consider a physical stabilizer or gimbal attachment to avoid those jarring jolts and shakes.
Storytelling on the Trail
Your ATV adventure is more than a series of jumps and turns; it’s a story. Think about the narrative you want to tell with your footage. Begin with a serene setting shot of your ATV, followed by mounting and revving up your engine, then unleash the full throttle of your journey. Capture wide-angle shots, close-ups of your ATV’s wheels conquering the terrain, and your reactions to the ride. Your aim should be to craft a visual story that brings your audience along for the ride.
Lighting: The Unsung Hero
The best action shots can be ruined by poor lighting. The golden hours, shortly after sunrise and before sunset, offer the best natural lighting for your GoPro footage. However, if you’re riding in the middle of the day, try to avoid direct sunlight that can cause overexposed shots. Your GoPro’s exposure settings can be adjusted, so play around to find what works best for the current lighting conditions.
Post-Production: Turning Footage into Masterpieces
Editing Software: The Final Touch
Once you’ve captured all your footage, it’s time to head into editing. Software like Adobe Premiere Pro, Final Cut Pro, or GoPro’s own Quik app can turn raw footage into a polished adventure story. Trim the fat, keeping only the most thrilling parts, and consider adding music to complement the mood of your footage.
The Importance of Sound
Sound editing is often overlooked but it’s crucial. The roar of your ATV’s engine, the crunch of gravel, and the rush of the wind add authenticity to your video. Use a windslayer or external mic to enhance audio quality, reducing wind noise and capturing the full range of sounds on your adventure.
